Introduction
Sig Sauer is a well-known manufacturer of firearms, suppressors, and in the last decade, they also started to manufacture different kinds of optics. Their market is mostly the military, but a lot of their products are also available to civilians.
When Sig Sauer introduced the Kilo 2000 rangefinder it quickly became a must-have item for many long range shooters since it can measure reflective targets till 3400 yards or 3100 meters, trees till 1500 yards or 1400 meters and deer all the way till 1200 yards or 1100 meters. But at the beginning of the year 2017, Sig Sauer introduced their new flagship rangefinder Kilo 2400 ABS. This new rangefinder has an even stronger laser build in (25% stronger than Kilo 2000), many different sensors, a windmeter and a ballistic calculator from the well-known company Applied Ballistics. The stronger and faster laser can read deer size targets till 1400 yards or 1300 meters, trees till 1800 yards or 1650 meters and reflective targets to astonishing 2 miles or 3200 meters. This rangefinder has a magnification of 7 times, and the objective lens diameter is 25mm.
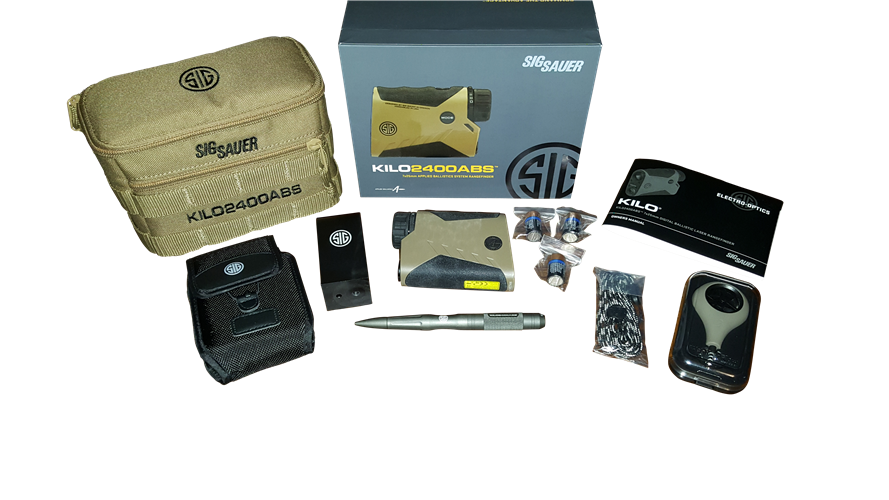
The Sig Sauer Kilo 2400 ABS comes in a durable cardboard box, and inside is the TAN colored nylon bag, with two MOLLE straps for attaching the bag on a backpack or a tactical west. The color of the bag is the same as the rangefinder. The inside of the bag is very rich with accessories, such as the instruction manual, which you will need for various settings and loading your gun profiles, a nice tactical pen that can be refiled or can be used even for breaking glass in an emergency situation.
In a nice plastic package, you also get a windmeter, that can be attached directly to your smartphone, and you get the readings in the software you can download from the Apple Store or Google Play. Another accessory is the tripod adapter, a cord that can be attached to the rangefinder, 3 batteries that last very long even if you make many measurements, and at least, the small and compact rangefinder Sig Sauer Kilo 2400 ABS with an extra nylon pouch for the rangefinder itself.
First, we’ve tested the rangefinder at home where the maximum range we could get was something over 1100 meters, because of the small hills all around. For this distance, we didn’t need to clamp the Kilo to a tripod, the laser is so strong and fast, you can easily get the readings when measuring from your hands. A very nice feature of the Kilo 2400 ABS is the Scan mode or ˝HyperScan˝ technology, which measures continuously 4 times per second when you hold the button for measuring, to get the measurement easily and more precisely. This was also very helpful on a night hunt, because with my Jahnke NSV 1×56 Night vision you see the laser beam. I was looking through the night vision and was holding the laser beam to the wild hogs that were 324 meters away. Very easy to get on the targets with the Scan mode or ˝HyperScan˝ technology! Whatsoever, the laser beam is 905 Nm, so it is not visible to any animal.


But do not think that because of the small lens (25mm) you can’t see when the sun goes down. We were able to make measurements even when the sun was down, and we still had a picture that was clear and enough bright. A very nice feature the Kilo 2400 ABS has is the ˝Lumatic˝ OLED display, which automatically adjusts the brightness of the display depending on the environment light. Thanks to this feature, you will get a very bright and clearly readable display when using the device on sunlight, and the same when using it in dusk and dawn. Whatsoever, this feature can be changed to manually if you don’t like it.

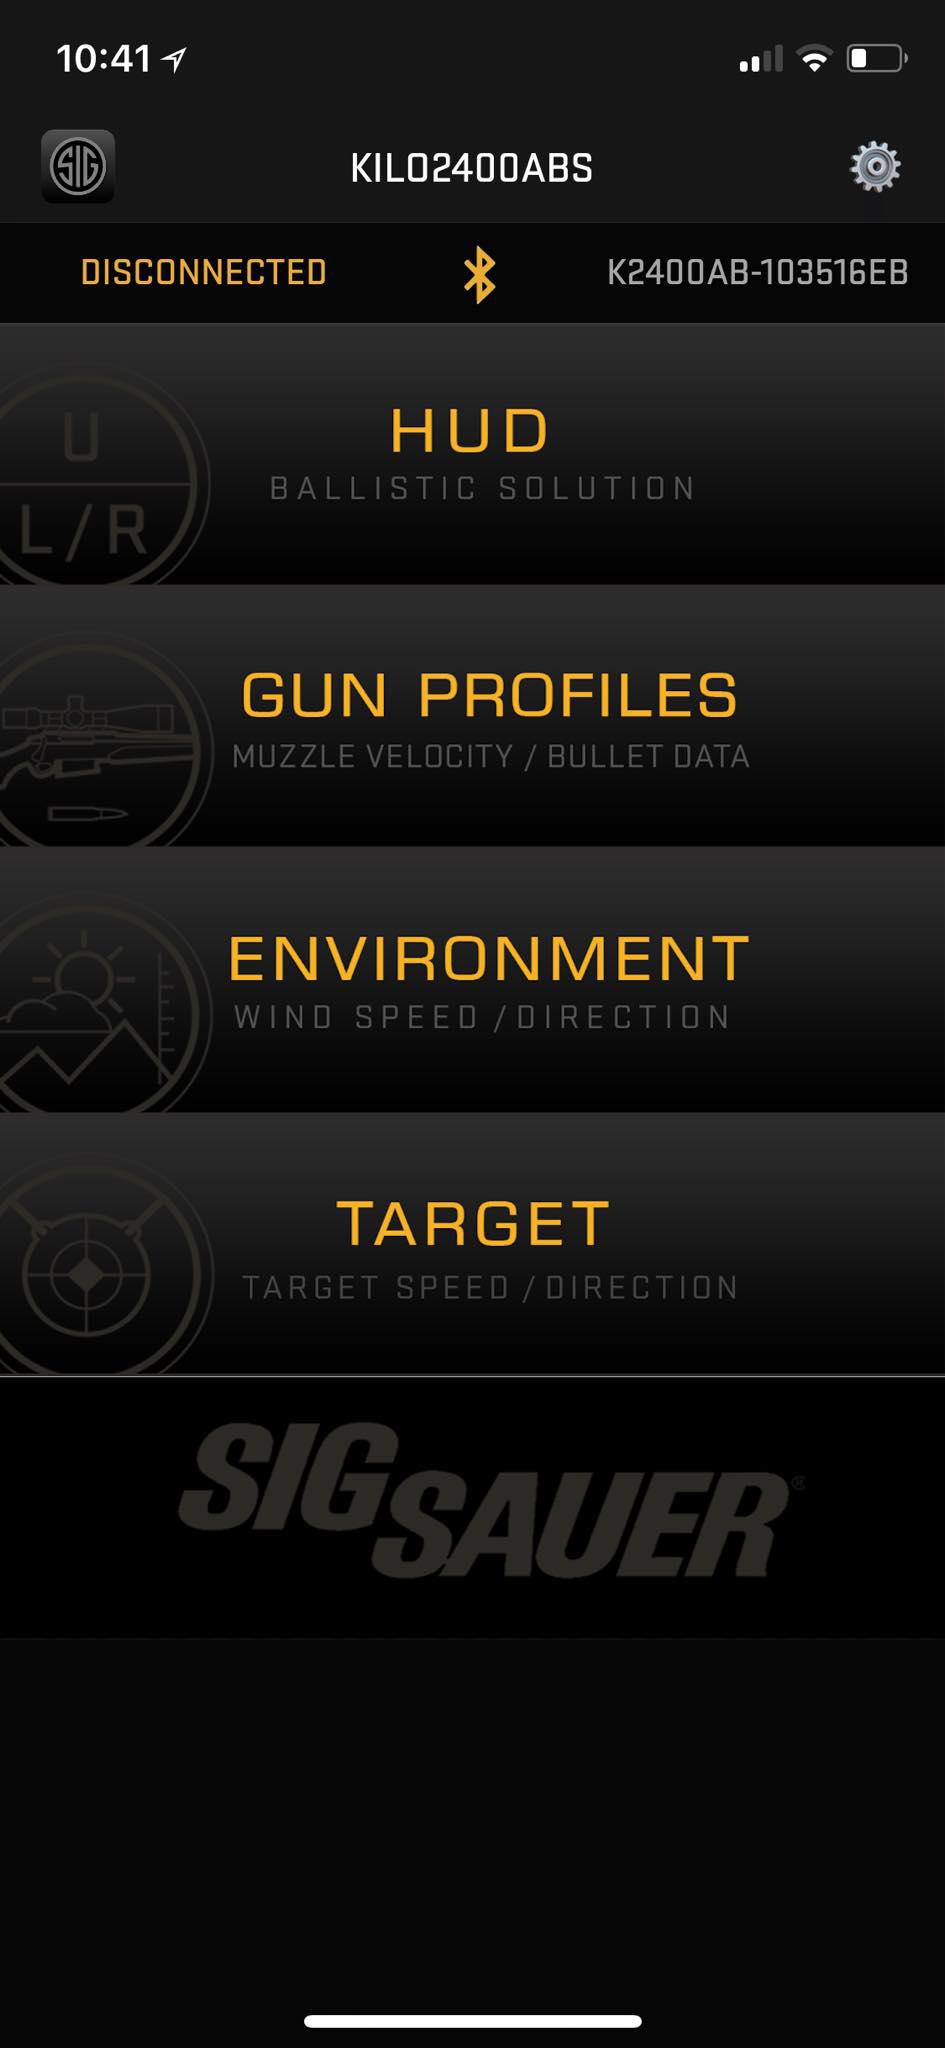
When we come to the software, like I mentioned before, you can find it on Apple Store or Google Play for free to download. When you open the program you see 4 different profiles, a tab to come into settings and on the upper side you see whether you are connected or disconnected to the Sig Kilo 2400 ABS.
The first profile HUD or ˝Head Up Display˝ tells you all the data you need to engage your measured target at a given distance. First, you see if the rangefinder is connected to your phone, and a sync button to synchronize the Kilo with the phone. Then, if we go from up till down, is the range you measured with the device, and how many clicks for elevation and windage you have to make to your scope to hit the target you previously measured. On the left side of the screen is a small ˝RANGE˝ button, which is really awesome! If you want to measure a target that is really far away and you can’t get a good reading from your hands, you install the Kilo on a tripod, adjust it to your desired target and press the ˝RANGE˝ button on your phone so it measures precisely without any fluctuations. The measurement is then as precise as possible. On the lower side of the screen is all the data your Kilo 2400 ABS was taking into account when calculating your bullet drop and wind drift. There we see the wind speed, muzzle velocity, the environment temperature, pressure, density altitude, bullet energy and the velocity the bullet has when it hits the target.
The Gun Profiles is the most important tab for any long range shooter. First, we have the bullet data. Most of us have standard bullets from well-known manufacturers, so we can simply take the data from the library. If not, all necessary parameters can be entered manually. Applied Ballistics made even a new custom curve for the bullet drop, that is in my case very accurate even when shooting well beyond 1000 meters with my 300-grain bullets in a .338 LM rifle. If you don’t want to use it, the standard parameters G1 and G7 are also available.
In the firearm section you have to put in your muzzle velocity, zeroing range, the height of your scope, zero offset and the twist rate. Here it is a little bit confusing if you put in the metrical units, the twist rate changes from 1 / 10 to 28.580 CM-R. If you let it in the American units, you just have to calculate the muzzle velocity and the scope height to fps and inches.
In the lowest section there is an MV-TEMP table, where you put in different muzzle velocities for different temperatures. This isn’t needed, but I’ve done it to get more information how it works.

The next tab is ENVIRONMENT. Here you see all the data your Sig Kilo 2400 ABS measures when you click the ˝RANGE˝ button. It consider into account the environment temperature, pressure, humidity, and even the compass direction you are shooting. To be even more accurate, you have to make the compass calibration in the settings, and the latitude (where you are located on the earth) in the ˝TARGET˝ section.

The last tab is the TARGET display. Here you have additional data your device measures, like heading and inclination. Additionally, you can add the latitude, the target speed (if your target is moving) and the direction your target is moving in. This feature is especially useful if you are in a competition or a hunt, where your targeted animal is constantly moving. So you get a perfect aiming point on longer distances.

Connectivity
When you have set all your parameters and gun data, you have to synchronize the rangefinder with the scope, to get all this data on the rangefinder itself. This is easily done with only a push of the button. The two devices are connected via Bluetooth, which is very reliable, so you can easily walk away with your phone for a couple of meters. On the rangefinder, you can save 4 different gun profiles, and it is very simple to change the profile in the Kilo when you need it. On your phone on the other side, you can save all up to 200 gun profiles and ammunition types.
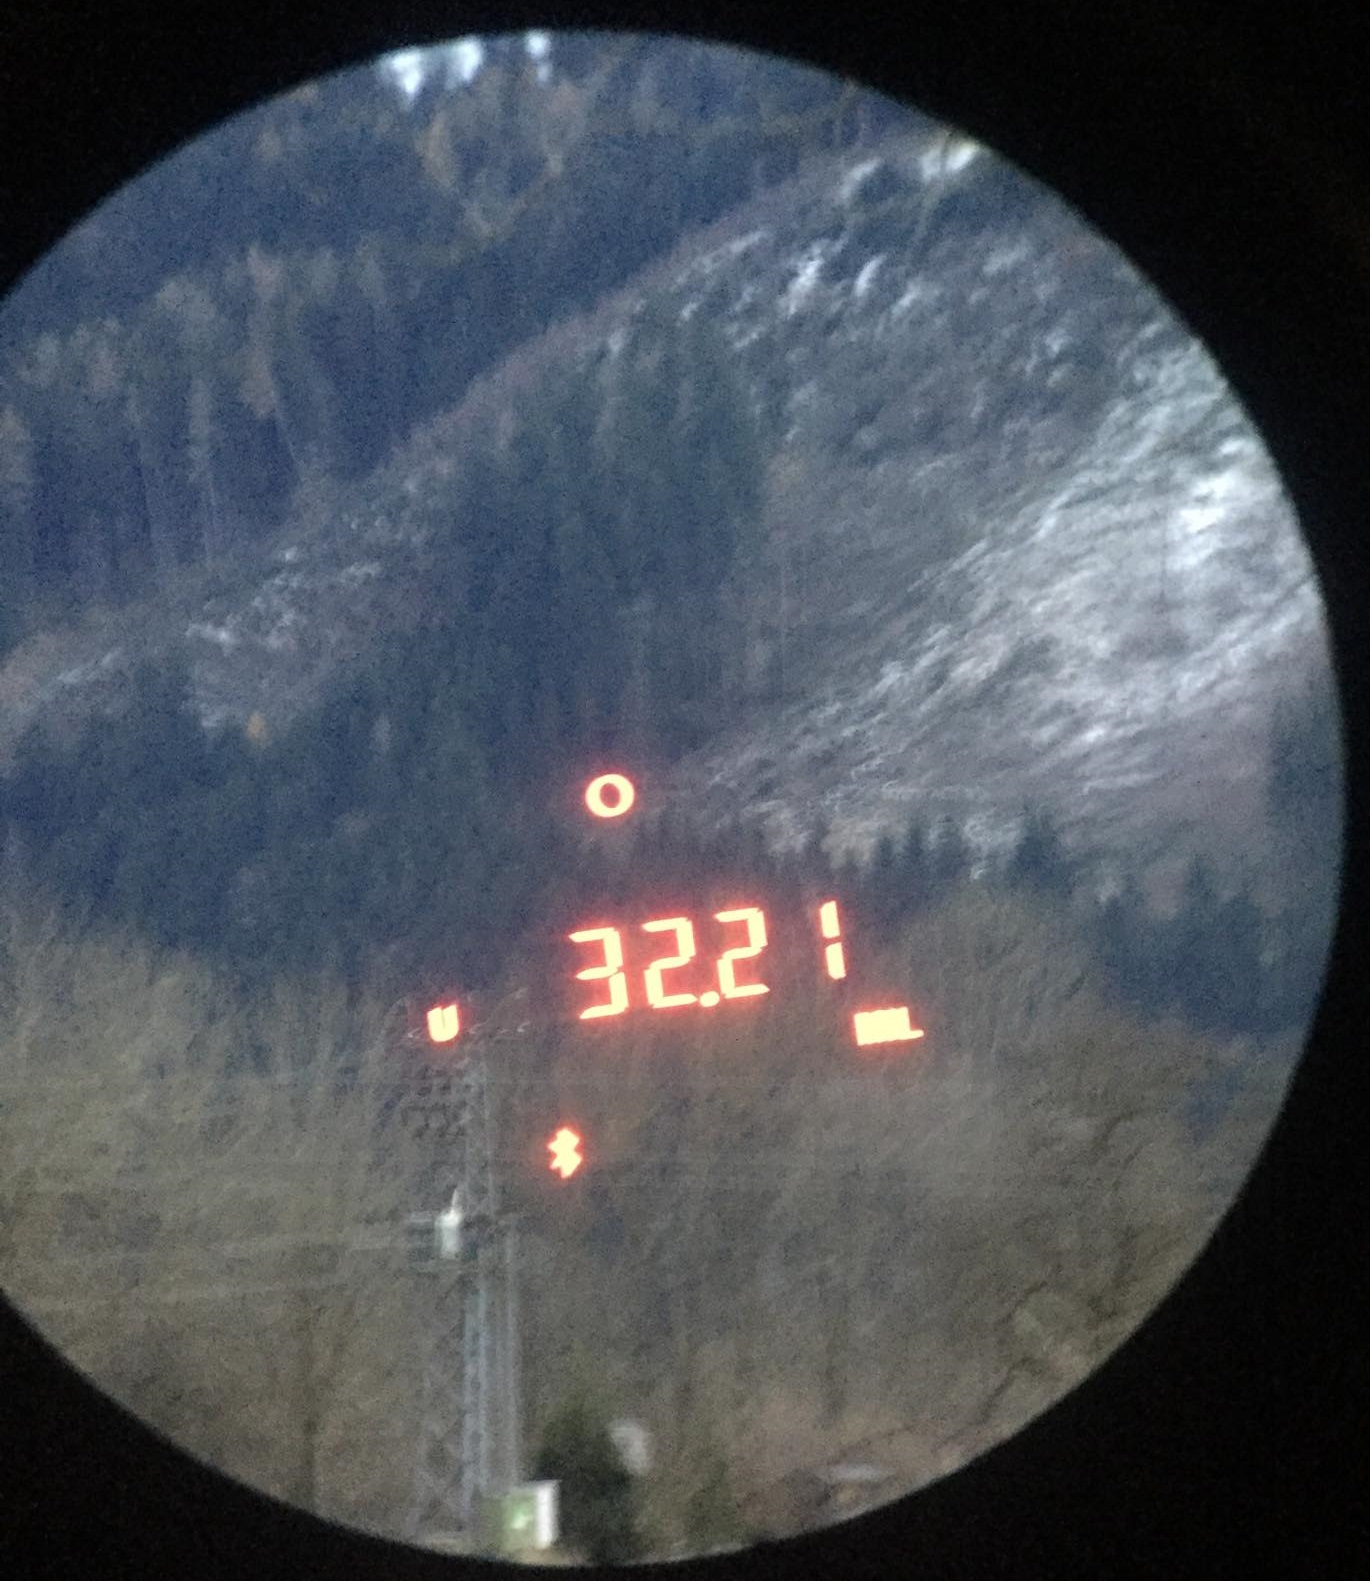
Display
The display is like I mentioned before a ˝Lumatic˝ OLED display, which automatically adjusts the brightness depending on the environment light. On this display you get many informations when you click the ranging button – the distance in meters or yards, clicks for correct elevation that can be displayed in MIL or MOA, windage adjustment clicks (small L or R for the correct side), battery level indicator, a Bluetooth indicator if the device is connected to your phone and the gun profile you are using. You can also choose if you want only a center aiming circle, the center aiming circle with a horizontal Milling line (30 MIL left and 30 MIL right of the circle) or even the center aiming circle with a horizontal and vertical Milling line (30 MIL upwards).

Field test
We tested the Sig Sauer Kilo 2400 ABS rangefinder on various locations and on different environmental conditions. Like previously mentioned, we tested the rangefinder at day under normal conditions, on a bright sunny day, dusk, dawn and even in the night. On all these tests the rangefinder performed better than we expected. We almost never had any problem getting a reading, just once, when we were in the Austrian Alps and it was snowing heavily. But also then the rangefinder gave us readings up to 1000 meters and sometimes even till 1500 meters. When the snowing stopped, we tried to make some measurements without any tripod and the furthest we were able to measure was astonishing 2243 meters! So if you have a tripod available, the Sig Kilo 2400 ABT will be able to measure targets further you can shoot with the most calibers.
The windmeter is also a very nice tool to have, and with my IPhone 6, it was working without any trouble. The problem is, mostly the wind isn’t the same from where you are shooting and all the way to the target. That’s why it is nice to have a rough measurement, but you can’t 100% trust the device when
you are shooting on distances like 1000 meters or beyond.
Disadvantages
Like every device or every tool, everything has its advantages and disadvantages. In our opinion, one of the disadvantages is the windmeter. It is a very nice tool to have, and with my IPhone 6, it was working without any problem. The problem is, mostly the wind isn’t the same from where are you shooting and all the way to the target. That’s why it is nice to make a rough measurement, but you can’t 100% trust the device when you are shooting on distances like 1000 meters or beyond.
Another minus we found out was the temperature sensor sensitivity. All the sensors are located inside the device, but the problem is, the device is warming up very quickly because of your hands. Like all long-range shooters know, the temperature is one of the biggest factors that cause different bullet trajectories. We found out this in our last test, where the temperatures were around -4 degrees Celsius. Very quickly the software showed us temperatures around 5 degree Celsius or even more. This means, when you carry the rangefinder, it should be placed somewhere it can’t warm up from your body temperature.

The last, but a small disadvantage is the software. Like I mentioned before, you can choose if you want metric or US units, but then it changes everything at once, so you can’t make some parameters in metric system and some in US units.


